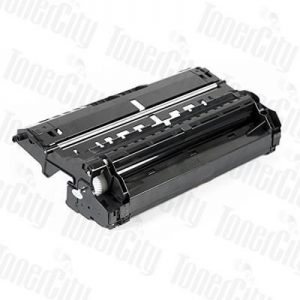

Are your documents coming out smudged? Are the beautiful colours of your photographs smeared everywhere? Your toner drum may need a clean.
While this can sound like an imposing task, it’s only slightly more difficult than just changing the cartridge. In fact, for many printers it’s identical – some manufacturers integrate the drum directly into the cartridge, so every time you change the cartridge you’re providing a brand new drum for your machine.
As such, this guide will assume that your machine has a built-in, non-replaceable drum. If that’s you, read on and let Toner City show you how you can get silky smooth, razor sharp prints again.
Automatic cleaning
First things first, let the machine have a go. Most modern printers offer an automatic cleaning mode that can fix your problem for you. The exact mechanism of this cleaning procedure will differ based on the make, model and design of your machine, but regardless it should be run about once a month or so.
But if after running it you’re finding that your pages are still a smudged mess, don’t despair. A manual clean could be just the thing to help keep your unit in top condition, and it’s not that hard at all.
Safety first
Before you get started, a few things you need to be aware of. Toner powder is extremely fine and can contain compounds such as silica and carbon powder which can be hazardous when inhaled or come into contact with bare skin. For this reason, we highly recommend wearing gloves and a surgical mask when cleaning a toner drum for your own protection.
Now that you’re protected, it’s time to do the same for the drum and the rest of your property. Like we said, toner dust is very fine – not only is it easy to inhale, it has a habit of getting everywhere. For the safety of your possessions, take the time to put down a tarp or piece of cloth where you’re going to be working, and try not to do it on the dining table!
Equally, you need to take care that you’re not exposing the toner drum to excessive light. Toner drums are photosensitive, and exposure to high levels of direct light – such as a window on a sunny day, or bright fluorescent tubes – can cause damage. Indirect light from an office lamp – not directly shining on the drum – should be enough to work by without damaging the drum.
Getting down to business
Now that you’ve got your workshop prepared, it’s time to get cleaning. Place the drum on your sheet and compare some of your most recent printouts – you’re looking for a consistent area of smudging. Once you’ve found it, you should be able to identify the mark that’s the cause of the trouble. Using the printouts as a guide, look for a mark on the drum. After locating it, take a dry cotton bud and wipe the surface a few times. If it’s a particularly stubborn spot, dip the cotton bud in some rubbing alcohol and then rub it.
Reassemble the drum and run a test page. If it’s clean – hooray! If not, you may need to replace your drum. Toner City stocks an exceptional range of drums and imaging units, helping you quickly and easily get your printer back up and running. Order today through our site or send us your questions via email at sales@tonercity.com.au and we’ll get back to you as soon as possible.